Advanced Interactive Design | Final Project : Completed Thematic Interactive Website
17.06.2025 - 22.07.2025 Week 09 - Week 14
Tracy Angeline Tio / 0362222 / Bachelor of Design ( Honors ) in Creative Media
Advanced Interactive Design / Taylor's University
FINAL PROJECT : COMPLETED THEMATIC INTERACTIVE WEBSITE
TABLE OF CONTENTS
LECTURES & ACTIVITIES
WEEK 9
This week, we have 1 on 1 consultation with Mr. Shamsul regarding on our prototypes for task 2. He gave us several feedback before we move to the final project.
WEEK 10
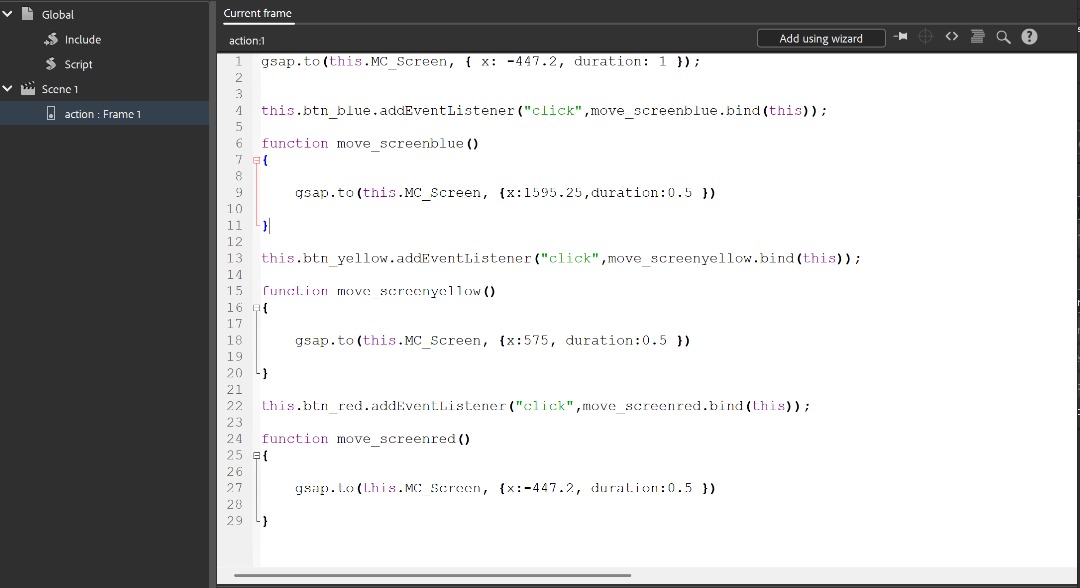
This week, we learned about GSAP which is a new things. GSAP is used when we want to control the button by adding instance name so we don't have to animate the scroll and button to play and stop one by one.
The first exercises is to make a sliding animation with button as shown below. We first make a rectangle and use alt shift to duplicate. After that select all and convert to movie clip. In the instance name, I named it as MC_Screen. This should be same in the GSAP later, along with the button as well.
 |
| Fig 1.1 Timelines Preview Week 10 24/06/2025 |
 |
| Fig 1.2 GSAP Preview Week 10 24/06/2025 |
This is the result for part 1 exercises.
After this exercises, Mr. shamsul told us to create another gsap button animation but this time, we try it using images background and need to zoom it. I did this by repeating the same step from part 1 exercises where I convert image to movie clip and circle shape to button. The new things for this activity is adding the Y position and scale.
Result for Part 2 Exercises can be seen below :
Fig 1.3 GSAP Exercises Part 1 Week 10 24/06/2025
 |
| Fig 1.4 Timelines Preview Week 10 24/06/2025 |
 |
| Fig 1.5 Action Preview for Exercise 2 Week 10 24/06/2025 |
Fig 1.6 GSAP Exercises Part 2 Week 10 24/06/2025
WEEK 11
No exercises given for this week, Class got canceled suddenly.
WEEK 12 - 14
Final Project Consultation.
INSTRUCTIONS
MIB BOOKLET :
FINAL PROJECT
Completed Thematic Interactive Website
On this task, we were required to synthesise the knowledge gained in task 1, 2 and 3 for application in task 4. Students will create integrate visual asset and refine the prototype into a complete working and functional product experience.
Requirements :
- Upload the website to a web server.
- Record a video walkthrough.
- Online posts in your E-portfolio as your reflective studies
- Make sure to embed or provide a link to the website and the video from the blog post.
---
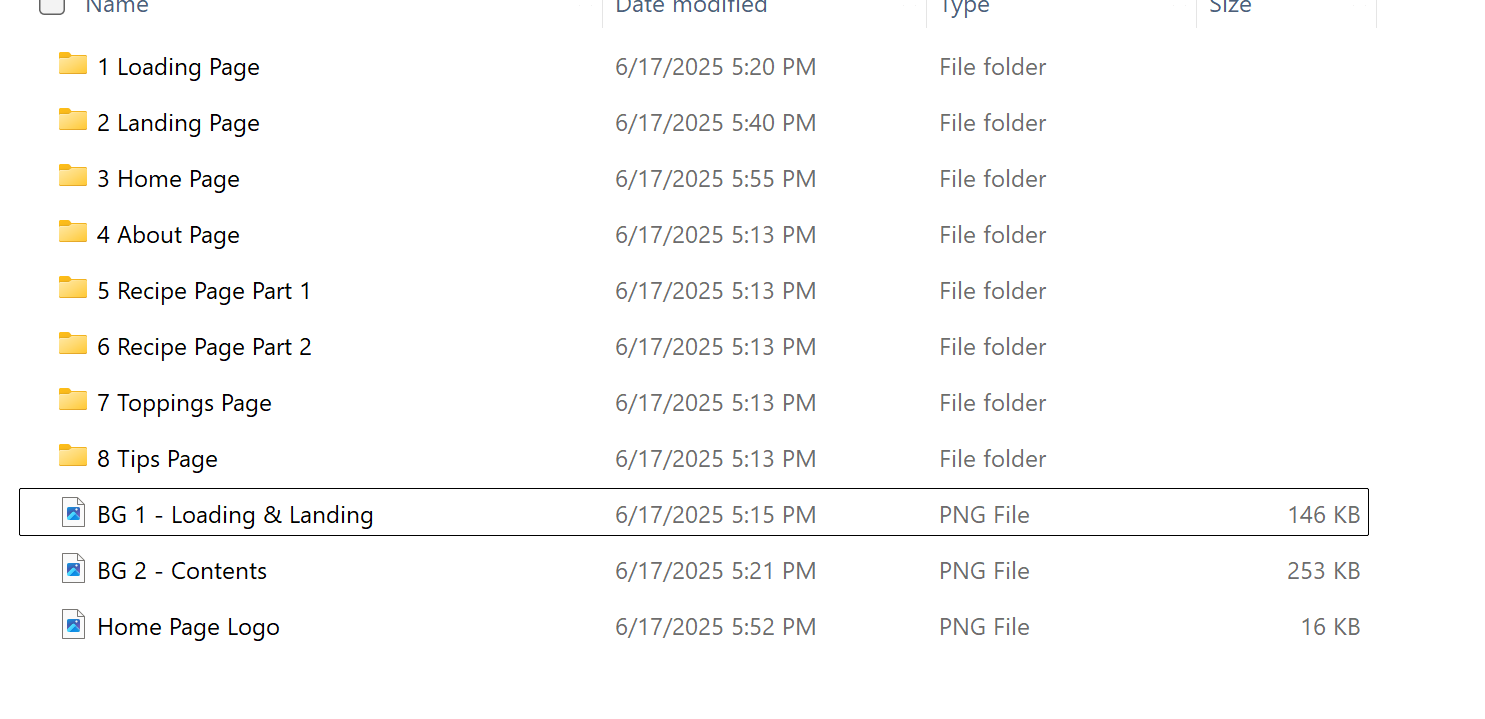
Download the Assets
After my wireframes has been approved to proceed into animate in week 9, I started to download the assets one by one and divided it into folder so it would be easier for me to import it later.
 |
| Fig 3.1 Imported Assets Week 09 17/06/2025 |
Web Page Progress in Adobe Animate
On Animate, I imported my assets inside the library and name the file as index. Start by background, elements and text, I began to create it per pages start from loading page.
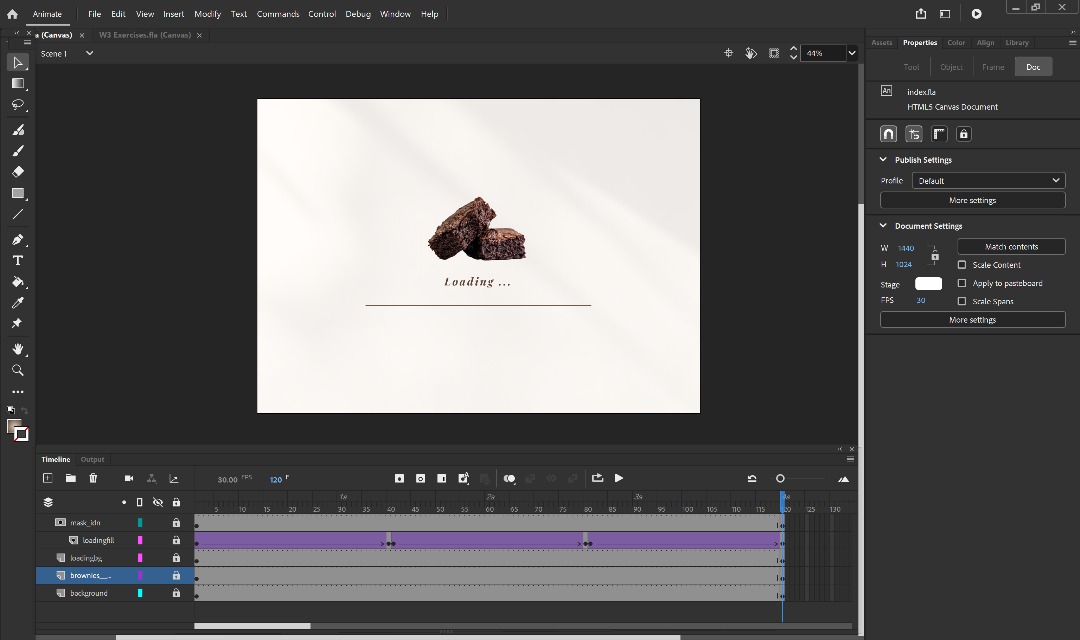
1. Loading Page
This page contains background, brownie photo, loading text and loading bar with shimmer effect on it. Altough this one looks simple, It took me a lot of time to make it works since most of my trial using tween doesn't work until I finally could think something that could work from GPT Tutorial by make the loading bar so long and apply mask.
 |
| Fig 3.2 Loading Page Progress Week 10 27/06/2025 |
 |
| Fig 3.3 Loading Bar Timeline Overall Week 10 27/06/2025 |
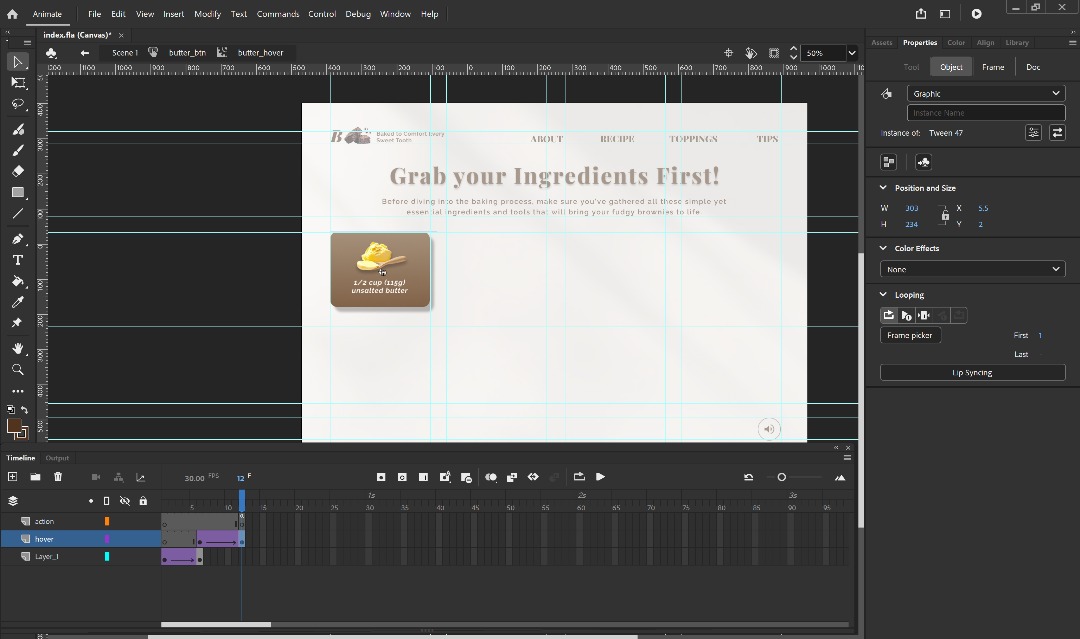
2. Landing Page
On this page, I break the element into separate layers like text, button, and crumbs for left and right side. By using classic tween and adjust the alpha to 0 - 100%, the animation fade would look smooth.
I learned from button tutorial as well to convert the brownie image into button and add actions on it.
 |
| Fig 3.4 Landing Page Timeline Week 10 27/06/2025 |
 |
| Fig 3.5 Actions to Made Button Functional Week 10 27/06/2025 |
- To STOP Animation : Add using wizard - Stop - This timeline - Next - With this frame - Finish and add
- To Add Button Function : Add using wizard - Go to frame label and play - This timeline - Enter label name - Next - On mouse click - Select the button instance name you alrd named it - Finish and add.
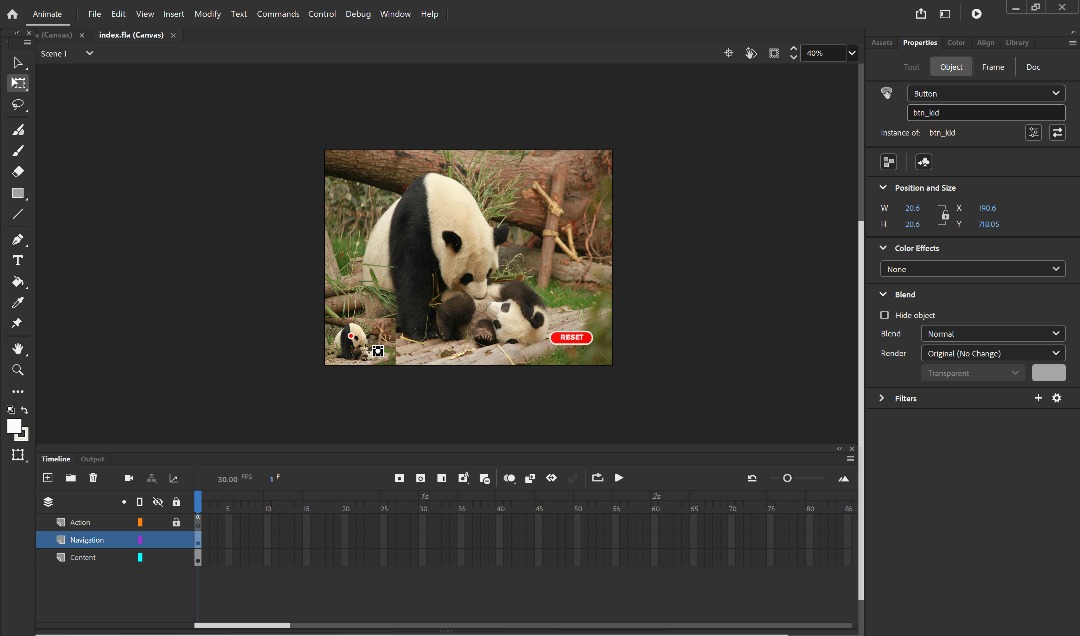
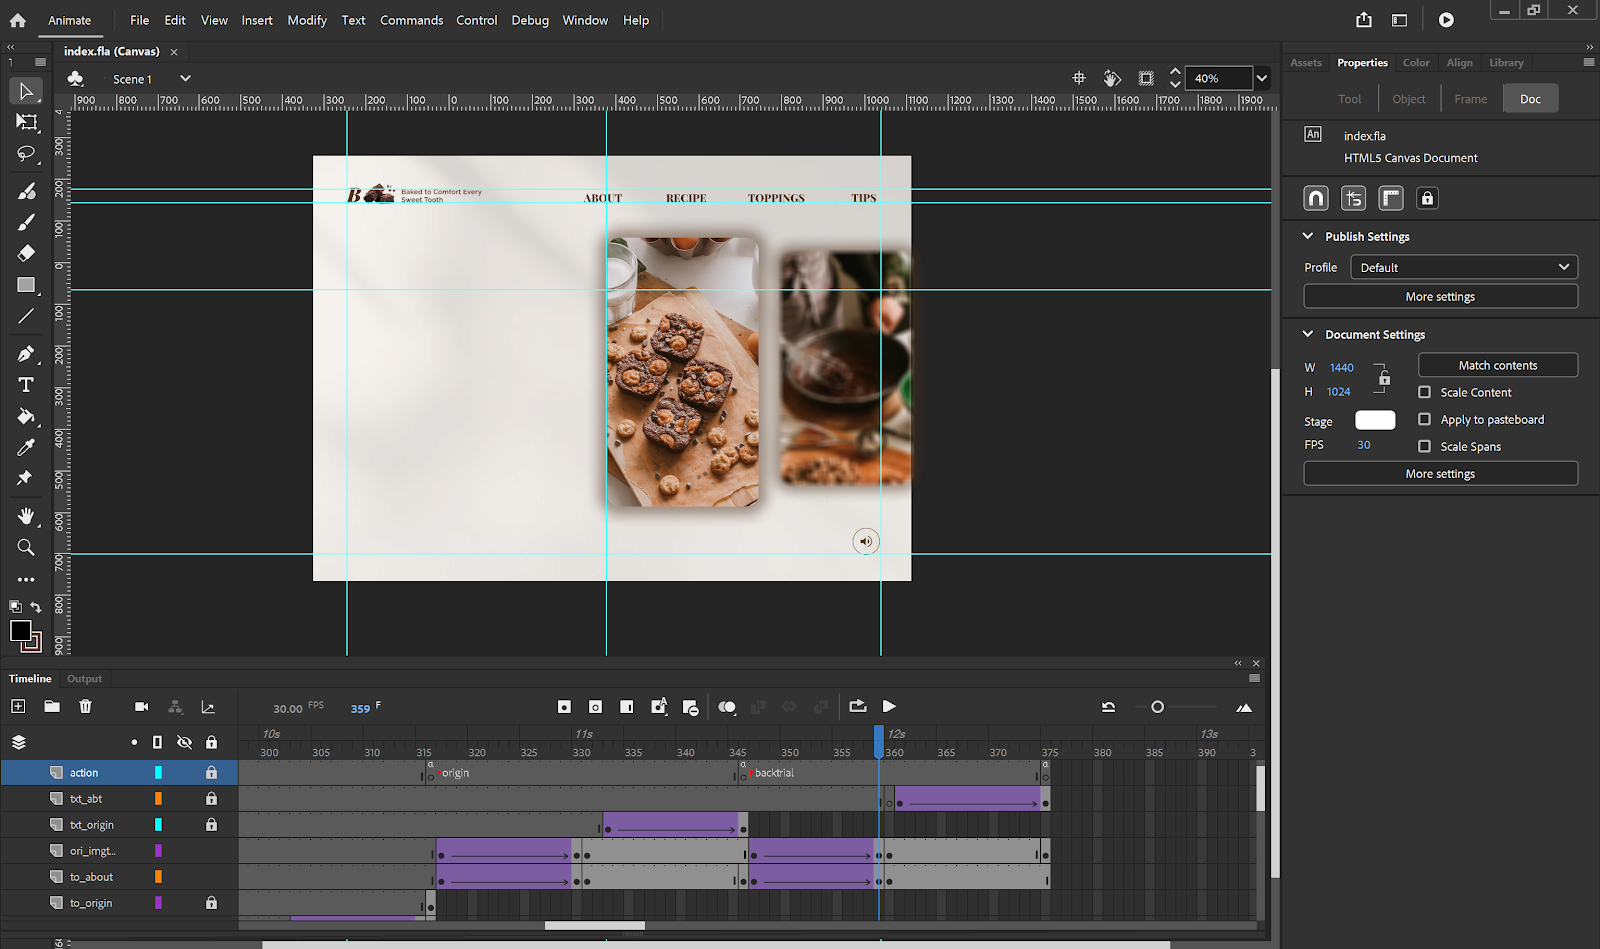
3. Home Page
Same with the previous stage, I break down every element in separate layer so I can animate them one by one. This page also took a long of time since there were many things I need to add function and animation.
 |
| Fig 3.6 Timeline Preview Week 10 28/06/2025 |
 |
| Fig 3.7 Movie Clip Animation Week 10 28/06/2025 |
 |
| Fig 3.8 Navbar Animation Week 11 02/07/2025 |
 |
| Fig 3.9 Navigation Bar Script Week 11 02/07/2025 |
 |
| Fig 3.10 Script to Go to Link Week 11 02/07/2025 |
4. About Page
The about page contains of text animation and then two image come up that act as a button. I made the image into movie clip to apply classic tween and the next frame I convert it into button.
 |
| Fig 3.11 About Page Progress Week 11 02/07/2025 |
 |
| Fig 3.12 Origin Page Preview Week 11 02/07/2025 |
 |
| Fig 3.13 Script to Go Back to About and Stop Animation Week 11 02/07/2025 |
After switch to origin, I want it to feel like a loop, so I copy the frames and do the same thing when user going back to about page. This is the frustrating part where I attempt several error even if I already name every instance and label correctly, sometimes, if the action layer position can affect to the entire function X_X.
 |
| Fig 3.14 Back to About Timeline Week 11 02/07/2025 |
5. Recipe Page
l divided this page into 2 part. The first part contains the ingredient list with hover using dark brown color along with the button to continue to part 2 which is the bake procedure. I'm using ruler to make all the card have a same size and position.
 |
| Fig 3.15 Ingredients Layout Progress Week 11 03/07/2025 |
 |
| Fig 3.16 Card Hover Week 11 03/07/2025 |
 |
| Fig 3.17 Timeline Overall Week 11 03/07/2025 |
 |
| Fig 3.18 Recipe Page Part 2 Progress Week 11 04/07/2025 |
 |
| Fig 3.19 Applied Motion Tween Week 11 05/07/2025 |
 |
| Fig 3.20 Timeline for Part 2 Week 11 05/07/2025 |
 |
| Fig 3.21 Timeline Label Part 2 Week 11 05/07/2025 |
6. Toppings Page
For this page, I made a fade transition using alpha and classic tween when the elements came start from text, background and the brownies. To make the brownies had an infinite scroll moving, I applied classic tween inside the movie clip and mask it.
 |
| Fig 3.22 MC Animation Week 11 06/07/2025 |
 |
| Fig 3.23 Toppings Timeline Week 11 06/07/2025 |
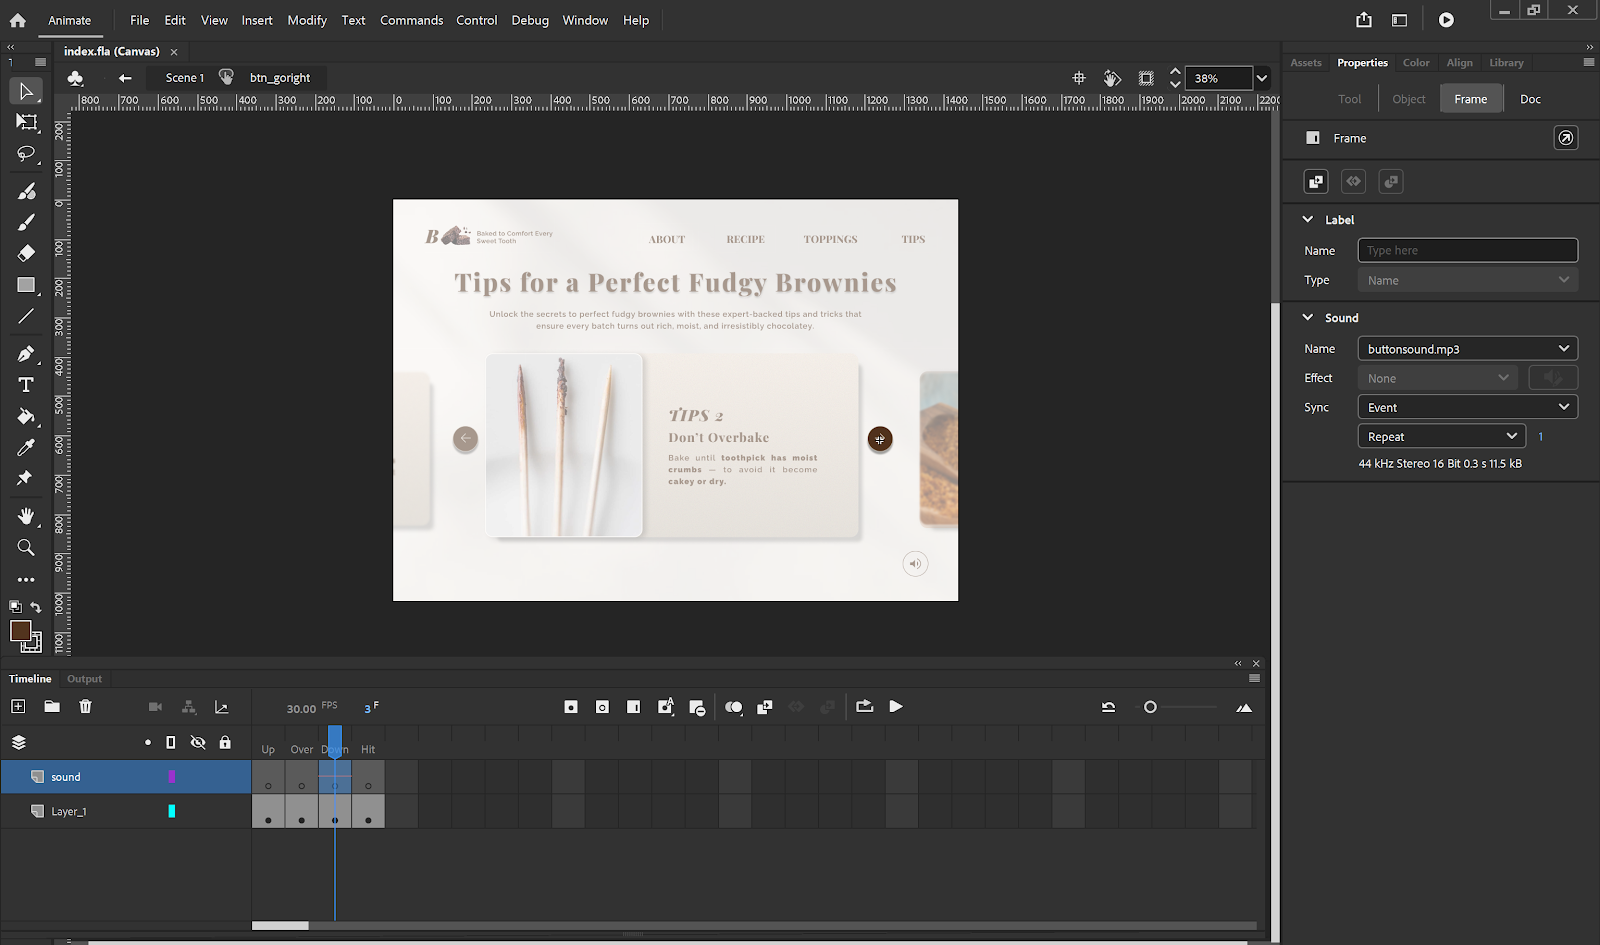
7. Tips Page
The last page which is the tips page, I implemented fade in fade out transition by adjusting the color effect "alpha" on it. I applied stop button and give label name so I can control the button to go on which card sequentially. |
| Fig 3.24 Tips Timeline Week 11 06/07/2025 |
 |
| Fig 3.25 Tips Button Action Week 11 06/07/2025 |
Adding Sound Effect and Background Music
The last part is to do the final checking and insert the sound effect to make it more interesting. For the button I applied mouse clicking sound effect while for the background, I insert lo-fi
Button Sound Sources : Mouse Click
Background Music : Coffee Time - Vlog Music
 |
| Fig 3.26 Sound for Button Week 11 06/07/2025 |
 |
| Fig 3.27 Background Music Week 11 06/07/2025 |
 |
| Fig 3.28 Sound Controller Code Week 11 06/07/2025 |
FINAL OUTCOMES FINAL PROJECT : COMPLETED THEMATIC INTERACTIVE WEBSITE
Netlify Link : https://fudgybrownies-tracyangeline.netlify.app/
*Please wait if it's show a white screen.
 |
| Fig 3.29 Website Preview Week 12 08/07/2025 |
Google Drive Link : HERE
 |
| Fig 3.30 Drive Folder View Week 12 08/07/2025 |
Web Showcase Video : HERE
Fig 3.31 Final Walkthrough Video Week 12 09/07/2025
FEEDBACK
Week 12
- The website looks so nice already and can start to publish it to netlify and submit it.
REFLECTIONS
Working on this project has been a valuable and challenging experiences. Starting from being clueless on how to using animate from the first week until I worked on this final project, I realized I have gain so many knowledge from everyday practices. Big thanks to Mr. Shamsul tutorials that make me reached until this places.
This project took almost 7-8 days straight start from beginning until finished since I felt at first, it was pretty hard but as long it passed, My progress become fast. Adobe Animate was a good app but it can be tricky as well. If you didn't name all the elements properly and adjust the layer, The workplace could be messy and hard to find what causes the error. From this things, not only I learned how to create a good design and connecting the page, I learn how to organize my layer and folder. For the end word, this module give me a great experiences to create a thematic interactive website.

Comments
Post a Comment