Application Design || | Task 3 : Interactive Component Design & Development
09.06.2025 - 07.07.2025 Week 08 - Week 12
Tracy Angeline Tio / 0362222 / Bachelor of Design ( Honors ) in Creative Media
Application Design II / Taylor's University
TASK 3 : INTERACTIVE COMPONENT DESIGN & DEVELOPMENT
This is the result for the week 9 activity. to reflect, using flutter flow is quite complicated especially in the setup part. There's so much things we need to activate carefully to avoid bugs.
We then create a list view and set our variable (image, name and price on it). After that we also set up the navigation for the list to go to the product details page. We create a parameter on it (Type : Document References) so we dont need to create all details page one by one for each product.
The last things is to add a review page and in the product details, we create the button to navigate to the review page. On the review page, we use back end call to navigate into the product list page.
This is the result for week 10 tutorials :
This is the result from week 11 activity.
For the rest on boarding, I just duplicate my first and change the information. This is the preview of it.
The preview for this sections can be seen on this video below.
For the popular services item, I use wrap to give more layout flexibility. Inside wrap, I applied 8 containers for each items and control the padding on it. Next, for the trend section, I'm using images and apply list view horizontal scroll.
After that, I made the favourite sections. Same as before, I use container and then add list view to make it scroll horizontal. This sections is challenging too for me where I attempt several problem.
For the heart icon on the right, I applied toggle icon and set a state variable. By adding stack, we can places our lottie animation that will be trigger when user click the heart icon.
For the navigation bar, I have try to add my custom icon but since I'm choosing the floating navbar, I cant adjust the text padding since it limited, so I'm just going with default style from flutter icon, so it match well.
This video shows the preview for the home page.
I added the state management field in the page and wrap in mouse region for my container. In the mouse region then, we need to add action for mouse enter and mouse exit by set the value true for enter and false for exit. Later then, we just need to adjust the fill color by adding the app state and fill the color needed.
To make the animation smooth, I turn on the implicit animate and apply ease out. For the rest of contents, it can be done by duplicate the first and adjust the padding.
Browse page preview can be seen in the video.
And continue with the second page inside which is My Bids. It have 2 categories which are project pending and completed. In my prototype, I didnt develop the completed page, but in flutter, I will develop it by adding lottie anim empty project to make it interesting.
Lottie Anim Sources for Completed : HERE
Preview can be seen on the walktrhough video.
Application Design II / Taylor's University
TASK 3 : INTERACTIVE COMPONENT DESIGN & DEVELOPMENT
TABLE OF CONTENTS
LETURES
WEEK 08
Video Tutorial : HERE
This time, we were introduced into flutter flow for the first time. Mr. Razif did a small briefing regarding on the tools inside flutterflow. Later then, we have an exercises to do 3 pages which are login page, sign up page and dashboard page.
We mostly created the elements using the widget provided in the flutter flow. After that we were required to settle the firebase and enable the authentication to run the flutter flow later. This is the result after the exercises, where it just not the wireframe function but the authenthicators was active so if the password / email have issue, the notification would shown on the bottom.
Fig 1.1 W8 Exercises Flutter Flow Week 08 09/06/2025
WEEK 09
Video Tutorial : HERE
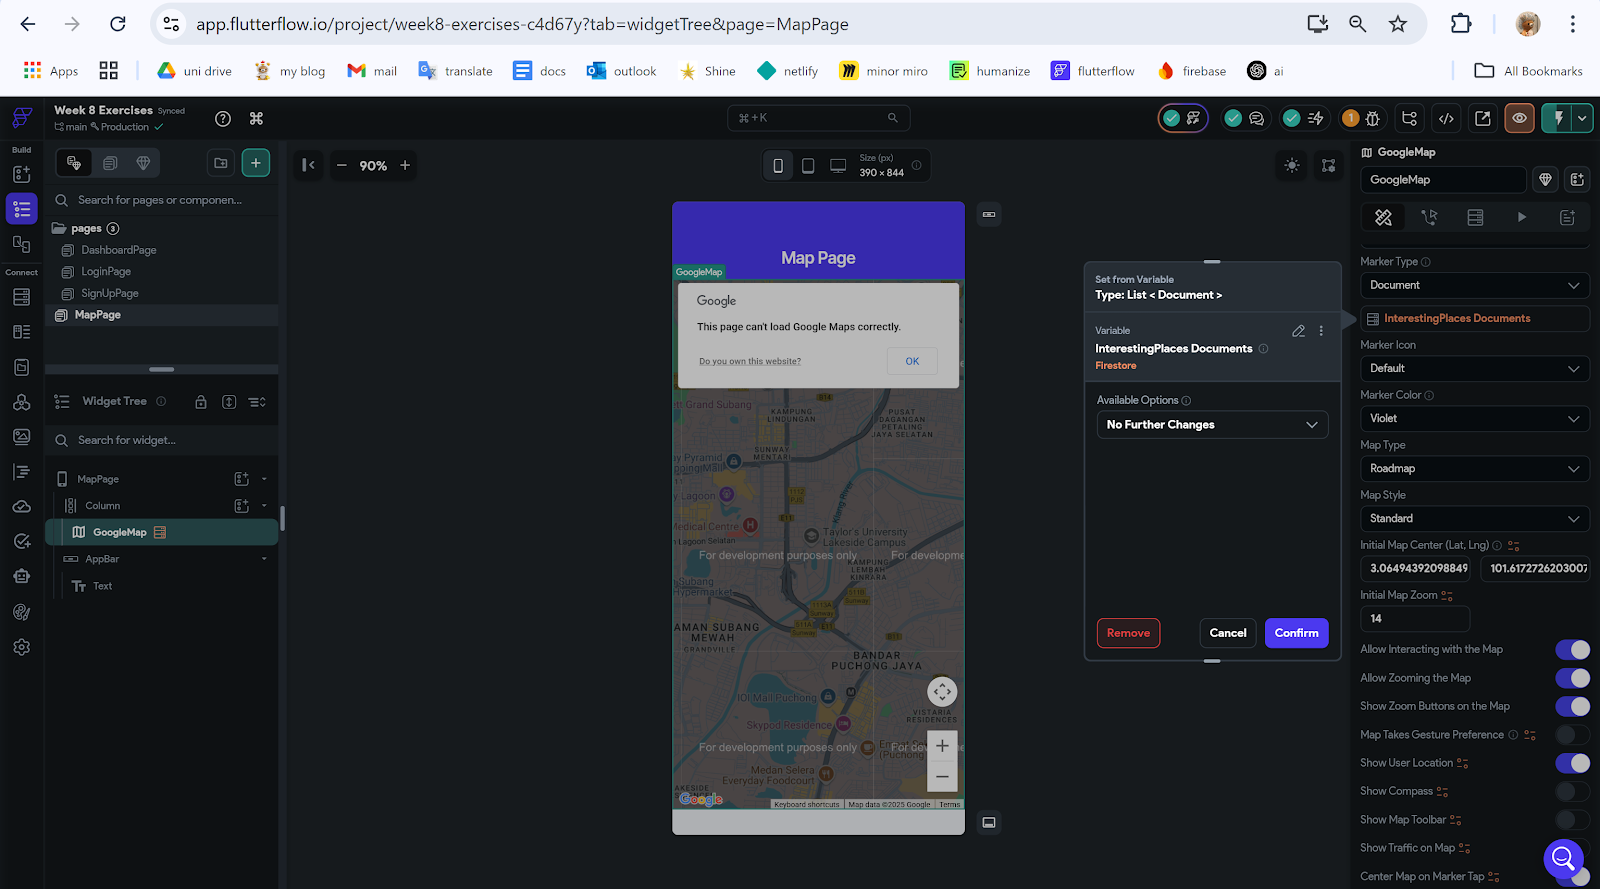
On this week, we continue the flutter flow exercises that we have did from last week. We need to add a new button in the dashboard "Go to Map" and tried to launching the google maps by adding Google API key and Firebase setup.
We first go to the widget and search for google maps in flutter flow. Once we checked the bugs, it notify us that we need API Key for Android, IOS and Website where we collect it through Google Cloud API Key. We were required to fill in the details like credit card and address in order to process.
 |
| Fig 1.2 Collecting the API Key Week 09 16/06/2025 |
Once we collect the key, we go to Firebase and in the storage part. At last, we click the deploy in Firebase and Add location point in flutter flow. This are the photo progress of it.
 |
| Fig 1.3 Deployed in Firebase Week 09 16/06/2025 |
 |
| Fig 1.4 Progress on Flutter Flow Week 09 16/06/2025 |
Fig 1.5 W9 Exercises Flutter Flow Week 09 16/06/2025
WEEK 10
Video Tutorial : HERE
Document Version : HERE
This time, we continue with our flutterflow exercises. Our task is to create a product list and adding review on it. We start by add a collection in the firestore and search for 3-5 shoes product in the internet and the images size should be same. After that, we need to fill in the information like description, price, quantity, time, etc. To insert the image in flutter flow, we need to input the picture to the media assets so that we can copy the link to the data manager.
 |
| Fig 1.6 Media Assets Week 10 23/06/2025 |
 |
| Fig 1.7 Products Document Collection Week 10 23/06/2025 |
 |
| Fig 1.8 Product Details Page Week 10 23/06/2025 |
 |
| Fig 1.9 Add Review Navigation Week 10 23/06/2025 |
Fig 1.10 W10 Exercises FlutterFlow Week 10 23/06/2025
 |
| Fig 1.11 Cart Contents Week 11 30/06/2025 |
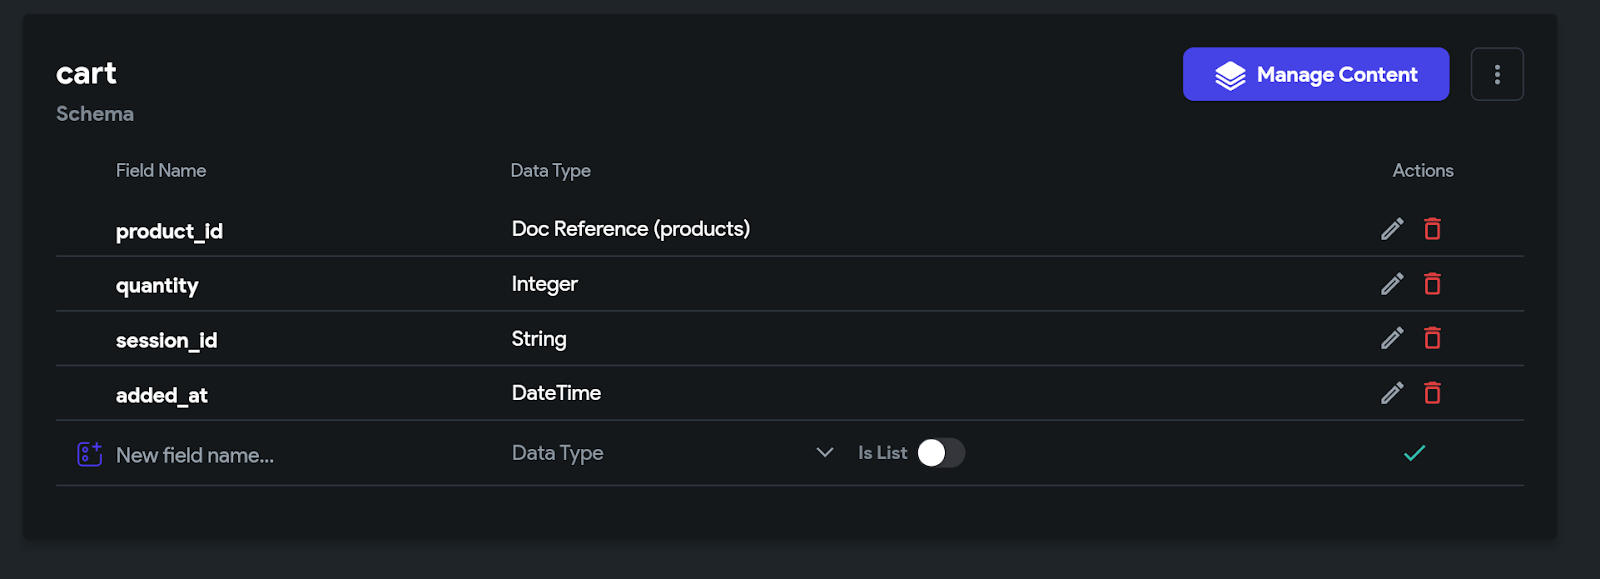
After placing the content in the firebase, we create a new button to add the items and creating the cart pages as well. In the cart pages, we just need to adjust the padding, spacing for the items style and adding the delete button since the function will be added from database system.
 |
| Fig 1.12 Add Cart Button Week 11 30/06/2025 |
 |
| Fig 1.13 Cart Page Week 11 30/06/2025 |
Fig 1.14 W11 Exercises FlutterFlow Week 11 30/06/2025
WEEK 12
No Class. Continue with the Task 3.
INSTRUCTIONS
MIB BOOKLET :
TASK 3
Interactive Component Design & Development
On this task, we will build upon the knowledge gained in Task 2 to create micro-interactions and animated micro-interactions for their app. This will greatly elevate the user experience of the app. The aim of this task is to get the students to explore and make creative decisions on the type of interactions they would want to integrate into their app.
The output of this task is a working animation element that are ready to be integrated in their final app. Meaning it’s no longer a visualisation like how it was in Task 2. This will be created using HTML/CSS and JavaScript with the use of animation framework if necessary.
Requirements :
- Interactive components/elements created in Flutter Flow / Lottie Files.
- Project Files & Video Walkthrough
- Online posts in your E-portfolio as your reflective studies
---
Task Breakdown
To began on this task, I listed down all pages I need to do in Flutterflow later. This are the list :
- Splash Screen Animation - Animate in Jitter
- On Boarding 1,2,3
- Log In and Sign Up
- Home Page - Explore and Access to Browse Project
- Browse Pages - MVP Features
- Project List and Details Page
- Place Bid and Edit or Retract the Bid
- Manage Page
- Go to My Bid Page - Quick Shortcut to Project Page
- Social Page
- Account Page
Fig 3.1 App Preview from Task 2 Week 06 01/06/2025
For this task, I aim to finish from Splash Screen until Account Pages, except the MVP Features. The MVP Features would be build on the final project later.
 |
| Fig 3.2 Task 3 List Week 11 05/07/2025 |
1. Splash Screen
For the splash screen, Instead of using lottie files, I found another tools to create animation more easier which is Jitter. Jitter provide a sample of animation like slide, fade, scale, spin, etc, which make me not spent too much time to figure out the animation.
 |
| Fig 3.3 Splash Animation Week 11 05/07/2025 |
And then, moving on to the Flutterflow, I made a stack and place my splash screen there and add status bar on top of it.
 |
| Fig 3.4 Splash Screen Progress Week 11 05/07/2025 |
2. On Boarding 1,2,3
For the onboarding page, I first download the illustration one by one and upload it into media assets. I changed the theme by adding my app color and typography and the rest of contents are wrapped in column. Meanwhile for the button skip and next are using row.
 |
| Fig 3.5 On Boarding Page Structure Week 11 05/07/2025 |
To make it more attractive, I also applied animation for components like the header text, body text, illustration and button. The animation applied are slide in, fade and scale for images.
 |
| Fig 3.6 On Boarding Animations Week 11 05/07/2025 |
Fig 3.7 On Boarding & Splash View in Flutter Week 11 05/07/2025
3. Log In and Sign Up
On this categories, the page are divided into 3 which are log in, sign up and password reset. I first made a container and implement off what we have learned from the exercises by using textfield. For the aunthethicator, I will add it later on the final project. Moreover, I added some animation fade and slide with delay so it would come in sequence one by one.
 |
| Fig 3.8 Log In Layout Setup Week 11 06/07/2025 |
 |
| Fig 3.9 Recover Password Layout Week 11 06/07/2025 |
As for the sign up page, I used row at first to divided text field for first and last name. And then I added a dropdown widget and country selections. At first, I implement some code given by AI but it resulting to the null value, so I following AI suggestion to add the country list manually.
 |
| Fig 3.10 Sign Up Page - Country Dropdown Week 11 06/07/2025 |
Fig 3.11 Log In Section Preview Week 11 06/07/2025
4. Home Page
For the home page, since it's a bit complicated rather than the previous page i'm doing, I try to break down every component and list the widget i'm gonna used.
Firstly I try to find an information on how to do the navigation bar. I adjust the settings and toggle the show nav bar, so I edit it based on my prototype I made.
 |
| Fig 3.12 Custom Nav bar From Flutter Week 11 06/07/2025 |
And for the home page, as a start, I added container to place my gradient background color. Then I insert column to create the entire content. I break the content into 4 part which is the greetings in dark container, listview that hold the popular services, trend and favourite project. The use of listview is to enable user for horizontal and vertical scroll.
 |
| Fig 3.13 Home Page Progress - Using Wrap Week 11 06/07/2025 |
 |
| Fig 3.14 Explore the Trend Week 11 06/07/2025 |
 |
| Fig 3.15 Layout Progress Week 11 06/07/2025 |
Summary Step :
- Add Lottie Animation using Stack - Lottie Anim Sources Heart
- Toggle Conditional, Insert value and Check the Show UI Builder
- Add Action for toggle icon.
 |
| Fig 3.16 Action Page Week 11 06/07/2025 |
 |
| Fig 3.17 Navigation Issue (The Home) When Using Custom Icon - Cluttered Text Week 11 06/07/2025 |
Fig 3.18 Home Page Preview Week 11 06/07/2025
5. Browse Pages - Front Page
After the home page, I move on to the browse page, which quite time consuming to figure out how to make the container have a hover effect, but it finally works at the end.
 |
| Fig 3.19 State Management Week 11 06/07/2025 |
 |
| Fig 3.20 Container Hover Fill Color Week 11 06/07/2025 |
 |
| Fig 3.21 Browse Page Overall Week 11 06/07/2025 |
Fig 3.22 Browse Page Preview Week 11 06/07/2025
6. Manage Page
To develop this page is not difficult as before as I duplicate the browse part and added a container for each list. Inside the container, I added a row to place my icon on the left, text and chevron on it.
 |
| Fig 3.23 Manage Page Week 11 07/07/2025 |
 |
| Fig 3.24 My Bids - Pending Page Week 11 07/07/2025 |
 |
| Fig 3.25 My Bids - Completed Week 11 07/07/2025 |
Preview can be seen on the walktrhough video.
7. Social Page
For this page, as it was not related to the MVP features, I just following from my task 2 prototype by develop the front page only. To do this, I duplicate the manage page and edit the text and icon to match with my design, along with animation style.
 |
| Fig 3.26 Social Page Progress Week 11 07/07/2025 |
8. Account Page
The account page were build with the same styles like manage and social. I pull the container height and add a new row to place the profile information such as images photo, name, job and chevron.
 |
| Fig 3.27 Account Page Progress Week 11 07/07/2025 |
For the profile page, the contents were extremely long and I was thinking to do it once my MVP features are finished, which is on the final project. For now, my focus was too just exploring flutter flow, learning layout structure so my progress for final could become faster once I understand everything.
FINAL OUTCOMES TASK 3 : INTERACTIVE COMPONENT DESIGN & DEVELOPMENT
Added Mr. Razif as Editor in My Project :
 |
| Fig 3.28 Added Collaborator Week 11 07/07/2025 |
Published App in Web Version :
 |
| Fig 3.29 Inspect Preview Week 11 07/07/2025 |
Notes : Please do right click - inspect and view in mobile size 393 x 852 / Iphone XR
Walkthrough & Presentation Video :
Fig 3.30 Final Task 3 Presentation Video Week 11 07/07/2025
Video Breakdown :
- 0.00 - 04.21 = Explanation and Presentation
- 04.22 - 06/02 = App Walkthrough
What has been done :
- Splash Screen Animation - Animate in Jitter ✔
- On Boarding 1,2,3 ✔
- Log In and Sign Up ✔
- Home Page - Explore and Access to Browse Project ✔
- Browse Pages - Front Only ✔
- Manage Page ✔
- Go to My Bids Page
- Social Page ✔
- Account Page - Front Only ✔
What yet need to be done :
- Browse a Project Page + Include Loading Animation
- Project Details & View Proposal Page
- Place a Bid Form
- View, Edit and Retract Bid
- Add Firebase for Log In Screen
- Inside Account Page if Neccessary - Optional
FEEDBACK
Week 09
- Mr. Razif mentioned that for my splash screen, it needs to be build on lottie / animation tools since flutter can't do that. He will try to double check on adding delay in flutterflow.
REFLECTIONS
Working on this project has been a valuable and frustrating journey. Since I'm never using flutter flow app before and the tutorial provided on internet are limited, I need to rely on AI to help me build the app. I spent a lot of time figuring out how to structure every widget mostly through this task.
Using flutter flow at first is hard and mostly we need to learn by ourself. The tutorial provided by Mr. Razif were super helpful to understand but not all of the features has been teached. As time passed by, my progress become smooth and clear which it can be considered rewarding, Afterward I have learned and start to understand how this app and widget works. For the next step, I will develop my MVP features and try to connect my app in firebase. Special Thanks to Mr. Razif AI also that always accompanying me doing this project.


Comments
Post a Comment